Crafting a Southwestern-Style Bowl
Crafting a Southwestern-Style Bowl: A Step-by-Step Guide
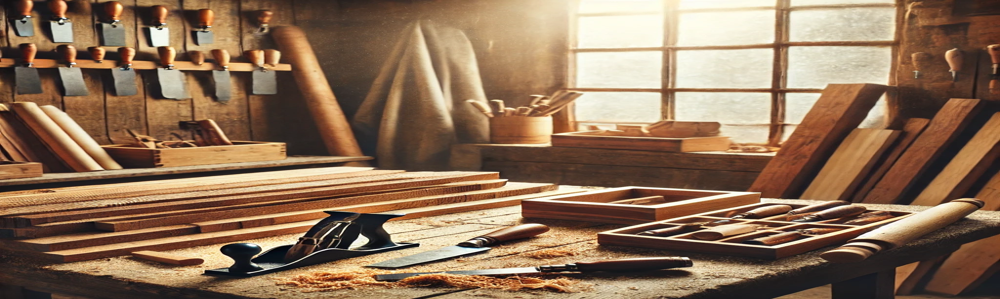
Hello there, fellow wood enthusiasts! Whether you’re a seasoned chip carver or you still mistake the bench vise for a meditative headrest (no judgment here), today we’ve got a fun project that’ll bring a bit of the warm Southwestern flare right to your workbench—a Southwestern-Style Bowl!
What You’ll Need
- A block of wood (elm or maple works wonders here—believe me, it’s worth the trip to the lumberyard)
- Your trusty lathe (hey, if you’re reading this and your lathe is a hairdryer taped to an office chair, maybe just take a note here)
- Chisels and gouges (let them be sharp, or hand them a ticket and let them travel somewhere else)
- Sandpaper (multiple grits—start low like a novice attempting karaoke and work your way up)
- Wood stain or paint in earthy tones like red clay or sunny yellow. Picture trying to bottle the essence of the desert sky.
- Food-safe finish (because we want to use this bowl, not just admire it!)
Step-by-Step Instructions
Step 1: Prepare Your Wood
First things first, let’s shape the raw block of wood into something more like a bowl blank. Remember, as you’re sawing away, keep those fingers away from anywhere they could end up as part of the final product. Have an idea of the bowl’s size and shape in your head before you start drilling into it like a curious squirrel.
Step 2: Mount the Wood on the Lathe
Get your wood securely mounted on that lathe. Give it a wiggle like you’re checking if a toddler is ready for a roller coaster ride. If it feels secure and isn’t about to fly off and land in your neighbor’s yard, you’re good to go!
Step 3: Shaping the Bowl
Turn on the lathe and begin shaping the outside of the bowl with a gouge tool. Picture yourself as a sculptor bringing a masterpiece out of a granite boulder, except you’re at home and infinitely less dramatic. Remember, patience is key here. It’s more of a slowly-carving-a-turkey pace rather than shredding-guitar-solos.
Step 4: Hollowing Out the Bowl
Once you’re happy with the outside shape (and secretly admiring it like a first-time marathon finish), it’s time to hollow the inside. Again, use your bowl gouge to carefully remove wood from the center, checking the thickness frequently. The last thing you want is a salad-sized toothpick holder.
Step 5: Sanding Time
Now, it’s onto sanding. Sand that bowl like it’s a compromise on IKEA assembly instructions—get every spot. Start with a lower grit to smooth out tool marks, then work your way to a higher grit so the bowl feels as smooth as your best pick-up lines.
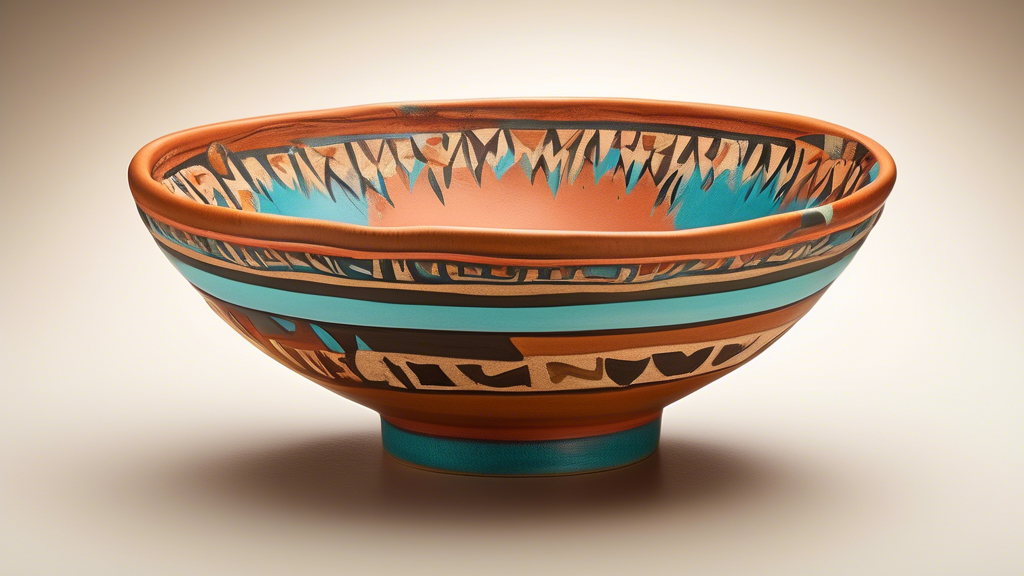
Step 6: Adding a Southwestern Flair
Use wood stain or paint to add those vibrant Southwestern hues. Think of it like painting a desert sunset—red rock, golden sands, a splash of azure. Just try not to channel a preschool art project while you’re at it.
Step 7: Finishing Touches
Finally, apply a food-safe finish like mineral oil. Trust me; this gives your bowl a gentle sheen and ensures it’s more than just visually appetizing. Think of it as giving your bowl SPF 50 against the dangers of pasta salad.
When Things Don’t Go as Planned
Now, if your bowl ends up looking more like an abstract art piece, welcome to the club! I’ve made bowls that couldn’t hold a marble, let alone cereal. It happens. Just remember, every mishap is really just a creative variation! Learn from it, laugh about it, and try again.
And if you ever find yourself shouting at a stubborn piece of wood like it’s a reality-show contestant, take a break. Treat yourself to a coffee or one of those biscuits you definitely didn’t make for the neighbors and come back to it. Your creativity will thank you.
Share Your Creations!
So what do you say? Will you give this Southwestern-Style Bowl a whirl? Share your results with us! Whether it’s gallery-worthy or a lesson in what-not-to-do, we’d love to see your work. After all, we’re all just a bunch of sawdust-covered dreamers making something beautiful, together.
Happy crafting!